AWS MediaLive HLS Integration
The AWS MediaLive service works by encoding your live video streams in real-time, taking a larger-sized live video source and compressing it into smaller versions for distribution to your viewers.
Additionally, the AWS MediaLive service can write encoded stream directly to Tebi Cloud for storage and distribution, allowing you to significantly cut your bandwidth costs and reduce complexity.
Let’s encode this sample video file stored in Tebi into an HLS stream using AWS MediaLive service.
Prepare Your Tebi Account
Let’s create a bucket to store our HLS video stream. AWS MediaLive will write HLS stream directly into this bucket. Let’s name it medialive-hls-test.
For simplicity, let’s configure our bucket default permission (ACL) to Public – this will make all files that AWS MediaLive service puts into the bucket publicly accessible without a signature. To have some protection, we allow requests only if User Agent is set to AWSElementalMediaLive. Open bucket preferences and open the Access Control tab. Select Public for the DataStream Default ACL option and save the form by clicking the Update button.
Allow AWS MediaLive to write to the bucket without authentication. Open bucket preferences and select the Bucket Policy tab. Check the Enable checkbox to enable Policy for this bucket. Input the following JSON policy into the JSON field:
 1{
 2  "Version": "2012-10-17",
 3  "Id": "MediaLive",
 4  "Statement": [
 5    {
 6      "Sid": "UAAllow",
 7      "Effect": "Allow",
 8      "Action": [
 9        "ds:PutObject",  "ds:DeleteObject"
10      ],
11      "Resource": "*",
12      "Condition": {
13        "StringEquals": {
14          "aws:UserAgent": [
15            "AWSElementalMediaLive"
16          ]
17        }
18      }
19    }
20  ]
21}
Save the form. Now, we have a bucket that is ready to receive data from AWS MediaLive and distribute it to clients for unrestricted playback. Read more about the Bucket Policy here.
If you plan to play your stream in the web player from a different domain, then you should enable Cross-Origin Resource Sharing (CORS) to allow your web-browser JavaScript code to access resources located in your bucket. To do this, open bucket preferences, select the CORS tab, and check the Enable checkbox to enable CORS for all domains. Leave the XML textbox blank. Now, save the form to apply changes. You can read more about Bucket CORS here.
Setup AWS MediaLive
Open AWS Elemental MediaLive service in your AWS Console and create a new channel.
Enter a channel name and select
HTTP live streaming / HLSas aChannel template.Create a new Input source by clicking the
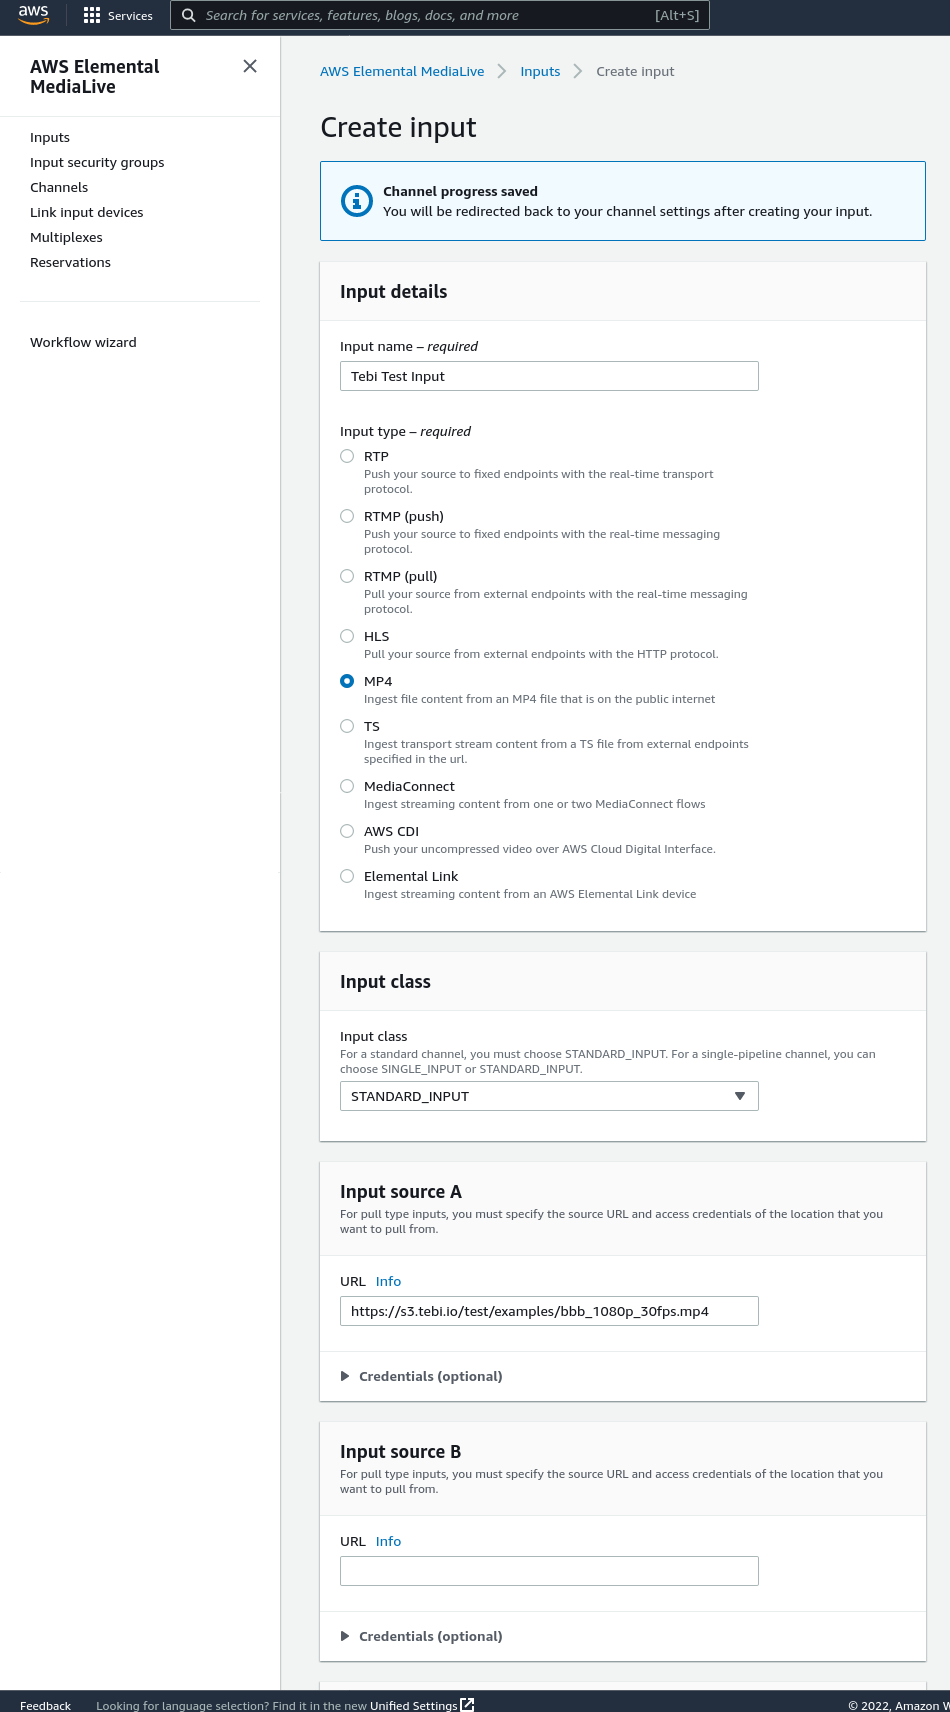
Addbutton in front of theInput attachmentssection.Click the
Create inputbutton to open theCreate inputform. Set theInput nameand select theMP4radio button in theInput typesection. In theInput source Asection, put our sample video URL: https://s3.tebi.io/test/examples/bbb_1080p_30fps.mp4.Click the
Createbutton to save the form.
Now, select the input that we just created and click the
Confirmbutton to attach this input to the channel.
It’s time to configure Output group.
Click on the already preconfigured Output group that was created when the
HTTP live streaming / HLSchannel template was selected at the beginning of the configurator.Input the Tebi DataStream endpoint URL for the bucket that you created. In our case, the URL will be https://medialive-hls-test.datastream.tebi.io/test.
In the
HLS settingssection, select theHLS basic putoption in theCDN Settingsdropdown menu.
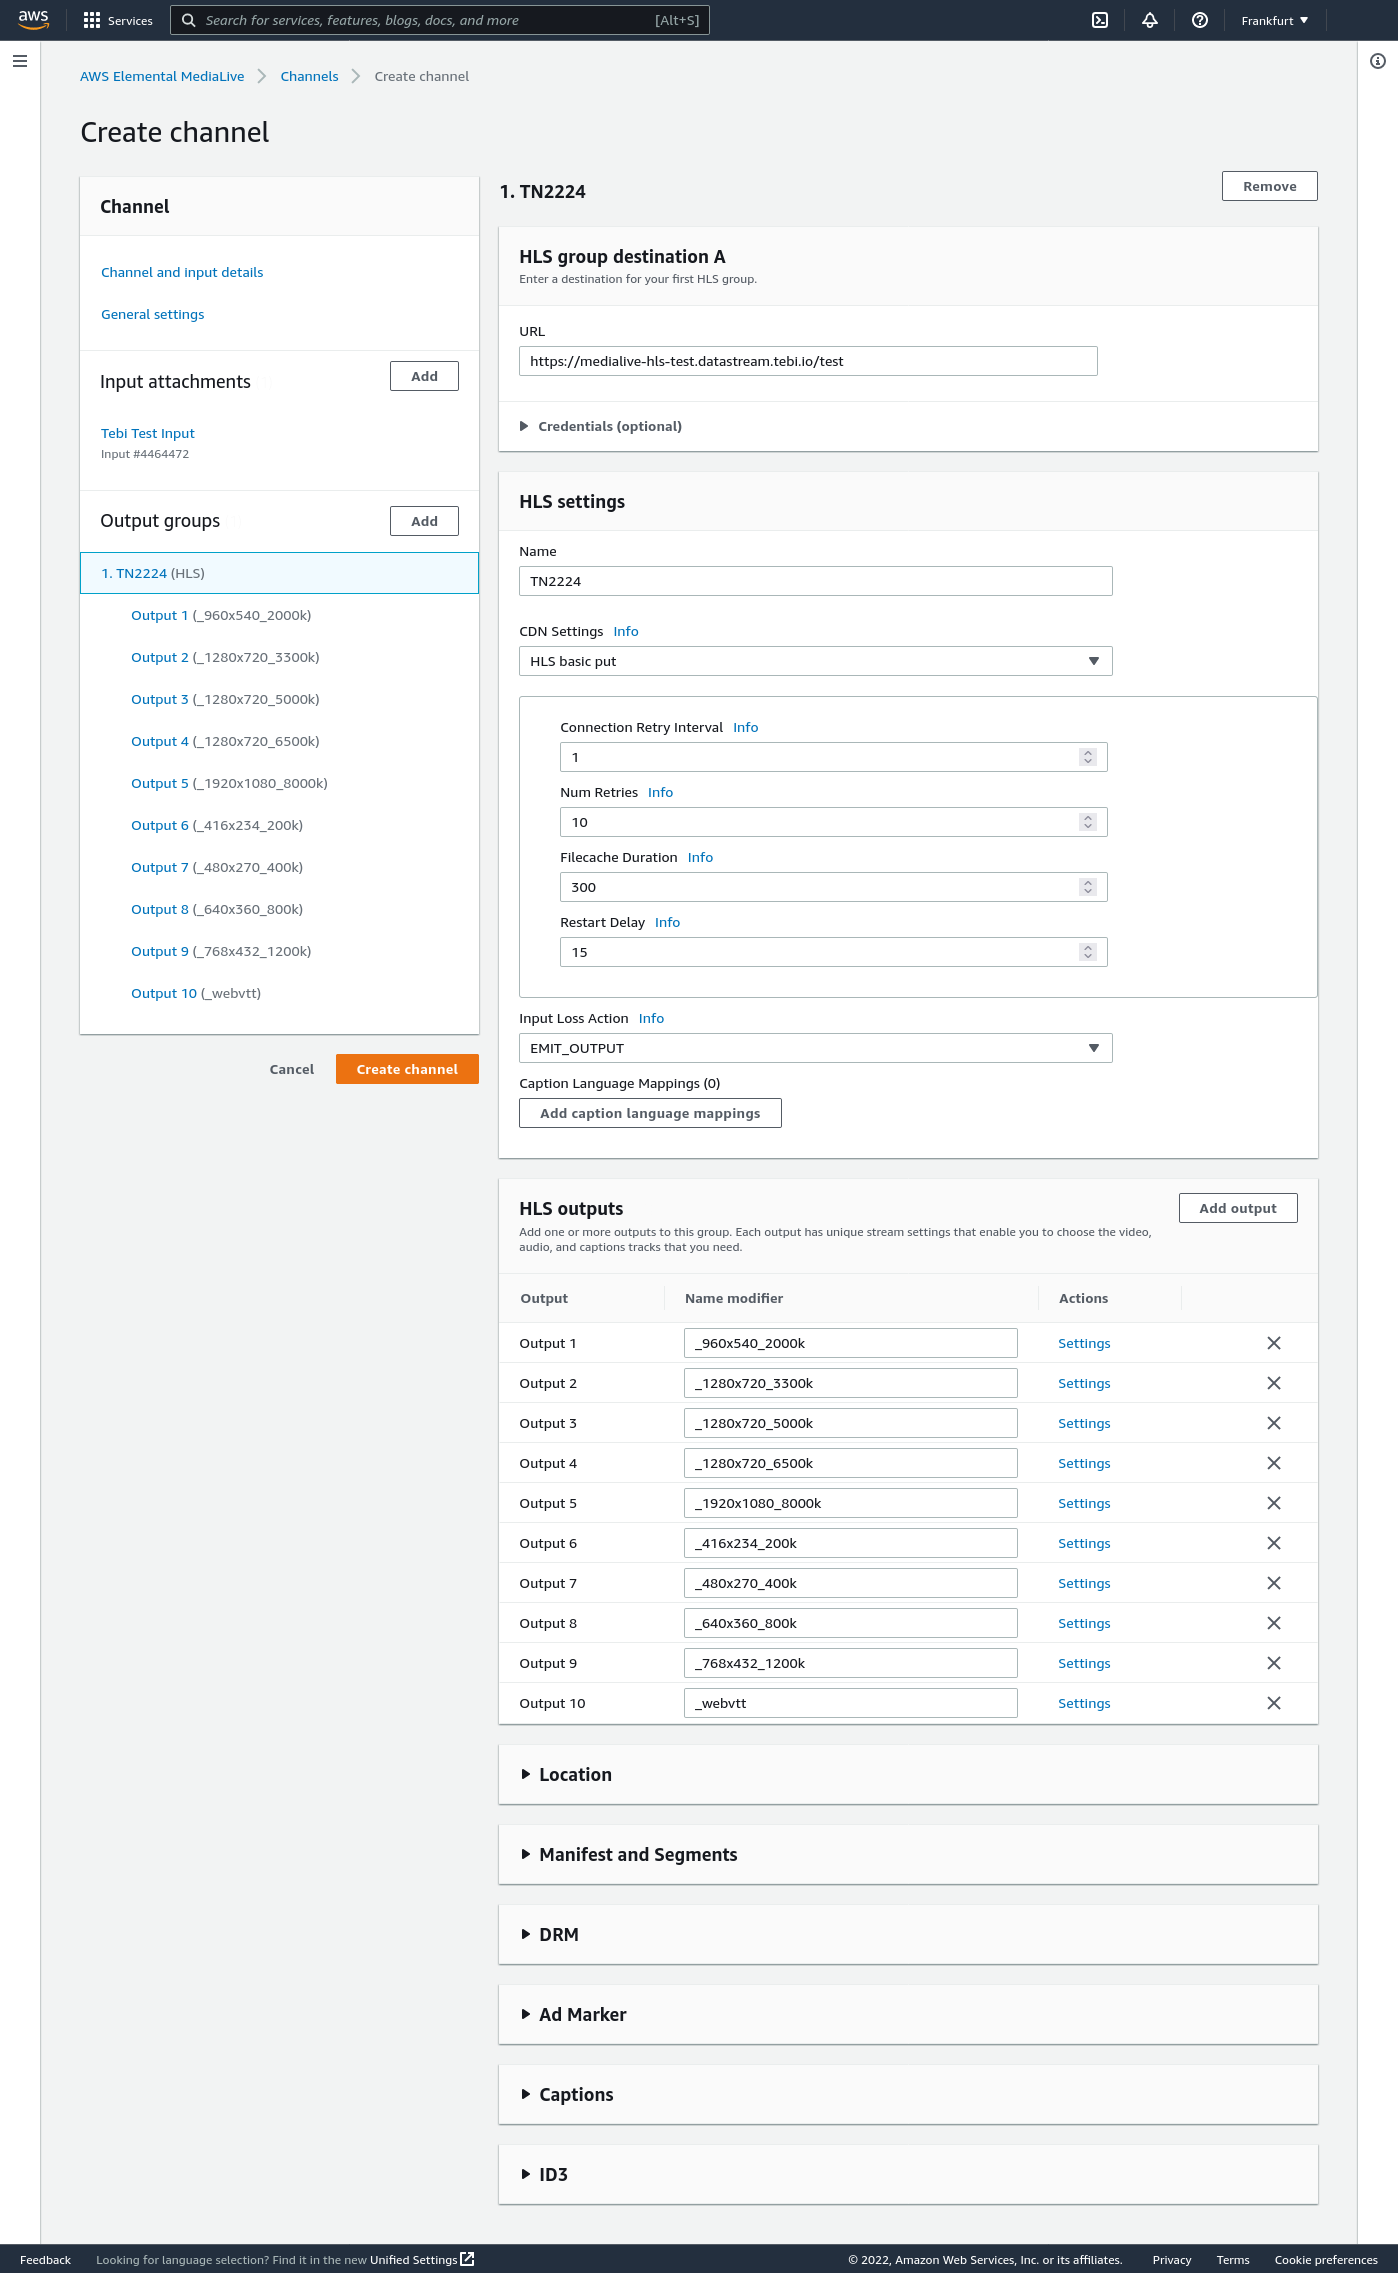
Click the
Create channelbutton to create the channel.
Now it is time to start this channel to test HLS video stream. Once the channel is started, you can access it using the following URL: https://medialive-hls-test.s3.tebi.io/test.m3u8.
Note
This documentation section is designed to be as simple as possible in order to quickly get you started with AWS Elemental MediaLive service and Tebi Cloud. There are many more options available to cover all possible use-cases. Please, contact our support team if you need any additional help.